
Get the Most Out of Your ShockStop Stem
Want to get the most out of your ShockStop Stem? Here are a few tips on how to get the perfect setup so you can conquer the gravel, smooth out the road, and enjoy your ride.
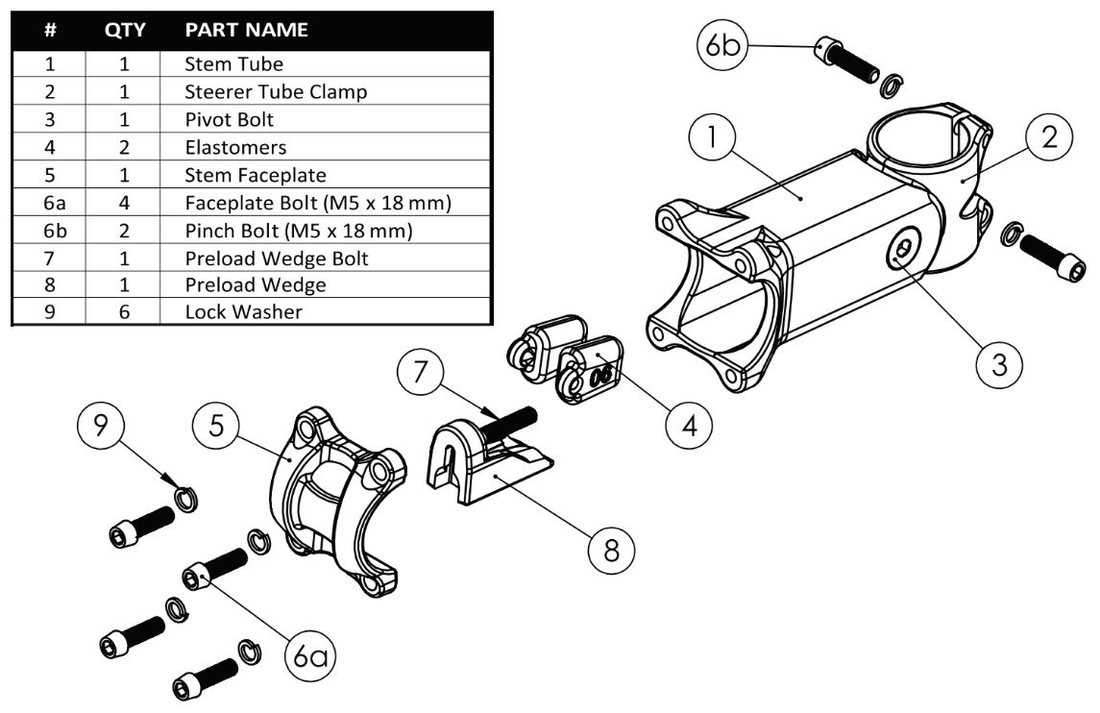
(1) Secure Your Pre-Load Wedge:
Once you have found the right elastomer combination, it's important to make sure that the pre-load wedge (#8 in the drawing below) is secure. In order to make sure it won't loosen when you are out on the road or trail, you will want to properly torque the wedge bolt (#7 in the drawing below). The standard torque setting is around 2.0 Nm but if you plan to hit the gravel hard or race on the cobbles we suggest you go up to around 3.0 Nm. And for an extra secure wedge, add some non-permanent thread-locker (like blue loctite).

(2) Tune the Stiffness:
The ShockStop features dual interchangeable elastomer springs that let you fine-tune the suspension feel to perfectly match your riding style. You can mix and match the different stiffness elastomers to dial in the right feel.
We include 5 different elastomers with your ShockStop which allows for a lot of combinations, and the ShockStop is shipped with the 70/80 combination which is generally going to be stiff for most riders. There is a chart in the instruction manual that provides guidance on elastomer combinations based on rider weight and handlebar style - below is an even more comprehensive chart that shows all the possible combinations and how they stack up in terms of stiffness. In general, you can go with a stiffer setup if you want vibration damping but a feel that is close to a rigid stem or you can go with something more flexible if you want more of an active suspension.

Bottom line: experiment to find out what is best for you. We recommend first riding with the configuration recommended for your weight/handlebar combination in the instruction manual. From there you can quickly find the right setup by adjusting slightly stiffer or softer to suit your specific riding preferences and conditions.
(3) Install with Confidence:
Removal of your old stem and installation of the ShockStop is detailed in the instructions - but sometimes it's nice to see all the steps in HD. We got you covered. Stephen, one of the co-founders of Redshift, put together a great video that goes over all the aspects of removing your old stem, installing the ShockStop, removing and replacing the elastomers, and much more.
If you want to jump to a certain point in the video - here is a list of links to each section on youtube:
- Compatibility
- Removing Your Stem
- Installing the Shockstop
- Removing Elastomers
- Choosing Elastomers
- Installing Elastomers
- Reattaching Handlebar
- Installing Accessories
- Utility Mount
- Computer Mount
You can learn lots more about ShockStop and see what people are saying by checking out the ShockStop page on our website.